


Continuous deployment (CD) is the process of automatically deploying changes to production. It is a key part of the DevOps toolchain, and it can help organizations to improve their software delivery speed, reliability, and security.
ArgoCD is a Kubernetes-native CD tool that can help you to automate the deployment of your applications to Kubernetes. It is a declarative tool, which means that you can define the desired state of your applications in a Git repository. ArgoCD will then automatically synchronize the actual state of your applications with the desired state.
ArgoCD is a powerful tool that can help you to improve your CD process. It is easy to use, and it can be integrated with a wide range of other tools. If you are looking for a way to automate the deployment of your applications to Kubernetes, then ArgoCD is a great option.
In this blog post, we will explore the process of setting up continuous integration (CI) using GitHub Actions, and then we will delve into configuring ArgoCD to handle the continuous deployment (CD) aspect.
Why argoCD ?
For a brief overview of the benefits and reasons for using ArgoCD, I recommend checking out my LinkedIn post on the subject. In the post, I discuss the key advantages of leveraging ArgoCD and provide valuable insights into how it can enhance your deployment process. Click below to access the LinkedIn post and gain a quick understanding of why ArgoCD is a valuable tool for your software development and deployment needs
Requirements
Installed
kubectlcommand-line tool.Have a Kubernetes cluster and a
kubeconfigfile. The default location for thekubeconfigfile is~/.kube/config. If you don't have a Kubernetes cluster set up, you can follow this guide to quickly bootstrap Minikube.A GitHub account.
Setting Up Continuous Integration (CI) Using GitHub Actions
For this activity, we will use a simple web application written in Python and utilizing Flask. The application has been specifically designed with cloud demonstrations and containers in mind.
To obtain the application code, you can fork this Github repository to your own Github account and then clone it to your local machine to start making changes and customizations as needed.
To create the workflows instruction for GitHub Actions, you'll need to create a YAML file following a specific structure. Start by creating a file named main.yml inside the .github/workflows directory of your repository. This file will serve as the configuration file for workflows. By following this standardized structure, you'll be able to define and customize the actions, triggers, and steps that make up your CI/CD pipeline.
Let's start the workflow configuration with the following structure:
name: ArgoCD demo Build

on:
  push:
    branches:
      - "main"
  pull_request:
In this configuration, we've named the workflow as "ArgoCD Demo Build". It will be triggered on both push events to the "main" branch and pull requests. The workflow will run on an "ubuntu-latest" virtual machine. This setup forms the foundation of the workflow.
jobs:
  test:
    name: 'Test'
    runs-on: ubuntu-latest
    steps:
      -
        name: Checkout
        uses: actions/checkout@v2

      -
        name: Run tests
        run: make test
Above, we define a job called "Test" that will run on the latest Ubuntu environment (ubuntu-latest).
The "Checkout" step ensures that the repository's code is available by using the
actions/checkout@v2action.The "Run tests" step executes the command
make testto run the tests.
  build:
    name: 'Build & Push to Docker Hub'
    runs-on: ubuntu-latest
    needs: test
    steps:
      -
        name: Checkout
        uses: actions/checkout@v2

      -
        name: Login to Docker Hub
        uses: docker/login-action@v2
        with:
          username: ${{ secrets.DOCKERHUB_USERNAME }}
          password: ${{ secrets.DOCKERHUB_TOKEN }}
      -
        name: Set up Docker Buildx
        uses: docker/setup-buildx-action@v2
      -
        name: Build and push
        uses: docker/build-push-action@v4
        with:
          context: .
          file: ./Dockerfile
          push: true
          tags: ${{ secrets.DOCKERHUB_USERNAME }}/image-name:tag
The next job is "Build & Push to Docker Hub," which also runs on the ubuntu-latest environment.
The "Checkout" step ensures that the repository's code is available by using the
actions/checkout@v2action.The "Login to Docker Hub" step authenticates with Docker Hub using the credentials that should be defined in the repository secrets in the GitHub repository settings.
The "Set up Docker Buildx" step uses the
docker/setup-buildx-action@v2action to set up Docker Buildx for building the Docker image.Finally, the "Build and push" step uses the
docker/build-push-action@v4action to build the Docker image based on the specifiedDockerfileand push it to Docker Hub. Make sure to modify thetagsfield to match your desired image name and version. And also add credentials to the repository secret before moving on.
Once everything is in place, you can initiate the workflow by pushing your changes to the repository. This action will automatically trigger the workflow to start. To monitor and gain insights into the workflow execution, navigate to the "Actions" tab in GitHub. Here, you'll be able to view the workflow status, check the progress of each step, and identify any errors encountered. If any issues arise, carefully review the error messages provided and make the necessary fixes before proceeding to the next part, which involves setting up the continuous deployment (CD) using ArgoCD.
Setting Up Continuous Deployment (CD) with ArgoCD
In this section, we will explore the process of setting up continuous deployment (CD) using ArgoCD. Building upon the foundation of continuous integration (CI) we established earlier with GitHub Actions, we will now focus on automating the deployment of our application to Kubernetes cluster.
You have the flexibility to utilize any Kubernetes (k8s) cluster at your disposal, whether it's a cloud-based cluster, a bare-metal setup, or even local environments such as Minikube or MicroK8s. ArgoCD is compatible with various Kubernetes configurations, allowing you to seamlessly integrate it into your preferred infrastructure. This versatility enables you to leverage your existing infrastructure or choose a setup that best suits your needs for continuous deployment (CD) with ArgoCD.
To proceed further, we will be utilizing Minikube for our setup. Minikube provides a convenient and lightweight way to run a single-node Kubernetes cluster locally.
Now, let's proceed with the installation of ArgoCD. We will walk through the steps to set up ArgoCD on your chosen Kubernetes cluster, in this case, Minikube.
Installing ArgoCD
To install ArgoCD on your Kubernetes cluster, execute the following commands:
kubectl create namespace argocd
kubectl apply -n argocd -f https://raw.githubusercontent.com/argoproj/argo-cd/stable/manifests/install.yaml
The first command creates a namespace called "argocd" where ArgoCD will be installed. The second command applies the ArgoCD installation manifest, which can be accessed from the official ArgoCD GitHub repository. By executing these commands, you will initiate the installation process and set up ArgoCD within your cluster.
Once the installation is completed, you can verify the installation status by running the following command:
kubectl get nodes -n argocd
This command will display the nodes in the "argocd" namespace, confirming that ArgoCD is successfully installed.
To access the ArgoCD web interface, you can use kubectl port-forwarding to connect to the API server. Execute the following command:
kubectl port-forward svc/argocd-server -n argocd 8080:443
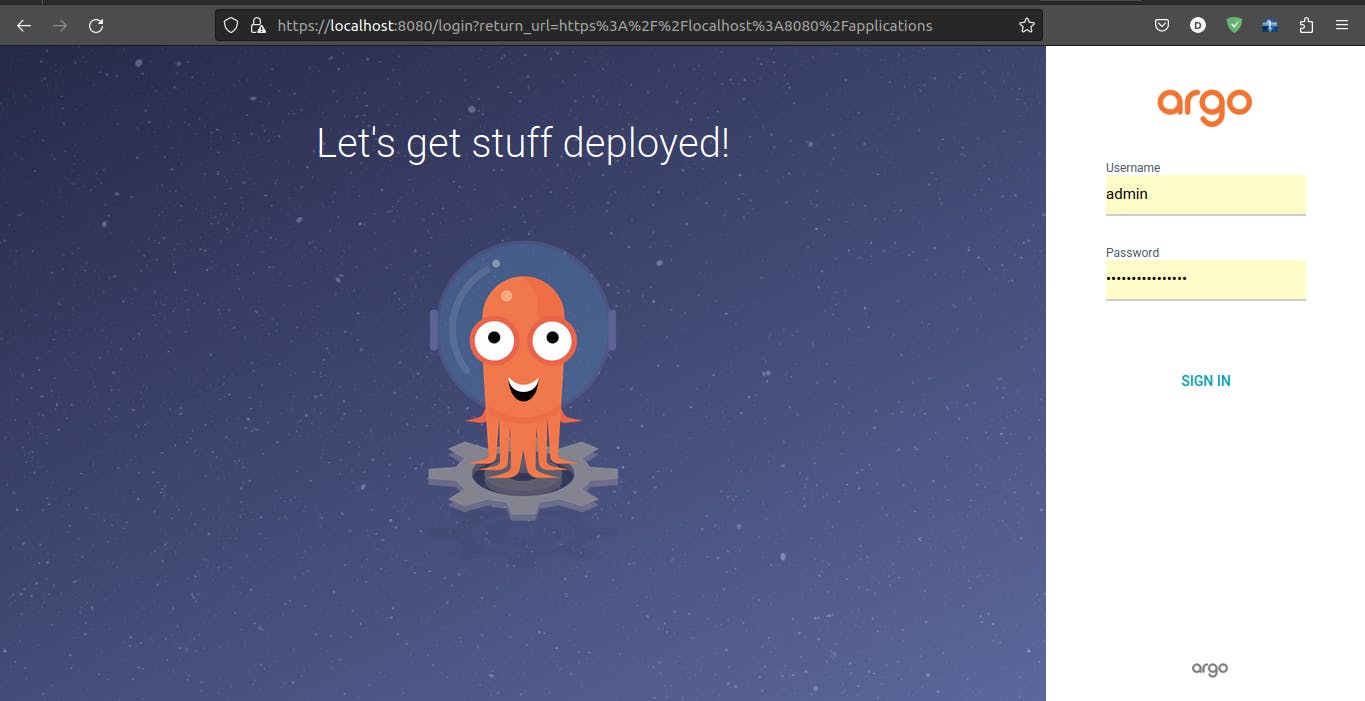
This command will create a port-forwarding tunnel, allowing you to access the ArgoCD UI locally at https://localhost:8080. Simply open a web browser and navigate to the provided URL to access the ArgoCD interface.
To log in to the ArgoCD UI, you will need to retrieve the password from the argocd-initial-admin-secret secret. Follow these steps:
- Retrieve the secret by executing the following command:
kubectl get secret argocd-initial-admin-secret -n argocd -o yaml
The output will include a field called
data, which contains the base64-encoded password. Copy the value associated with thepasswordkey.Decode the password using the
echoandbase64commands. Replaceencodedpasswordin the command below with the copied value:
echo encodedpassword | base64 --decode
The decoded password will be displayed in the terminal. Copy the password string.
Return to the ArgoCD UI login page. Enter
adminas the username and paste the decoded password into the password field.
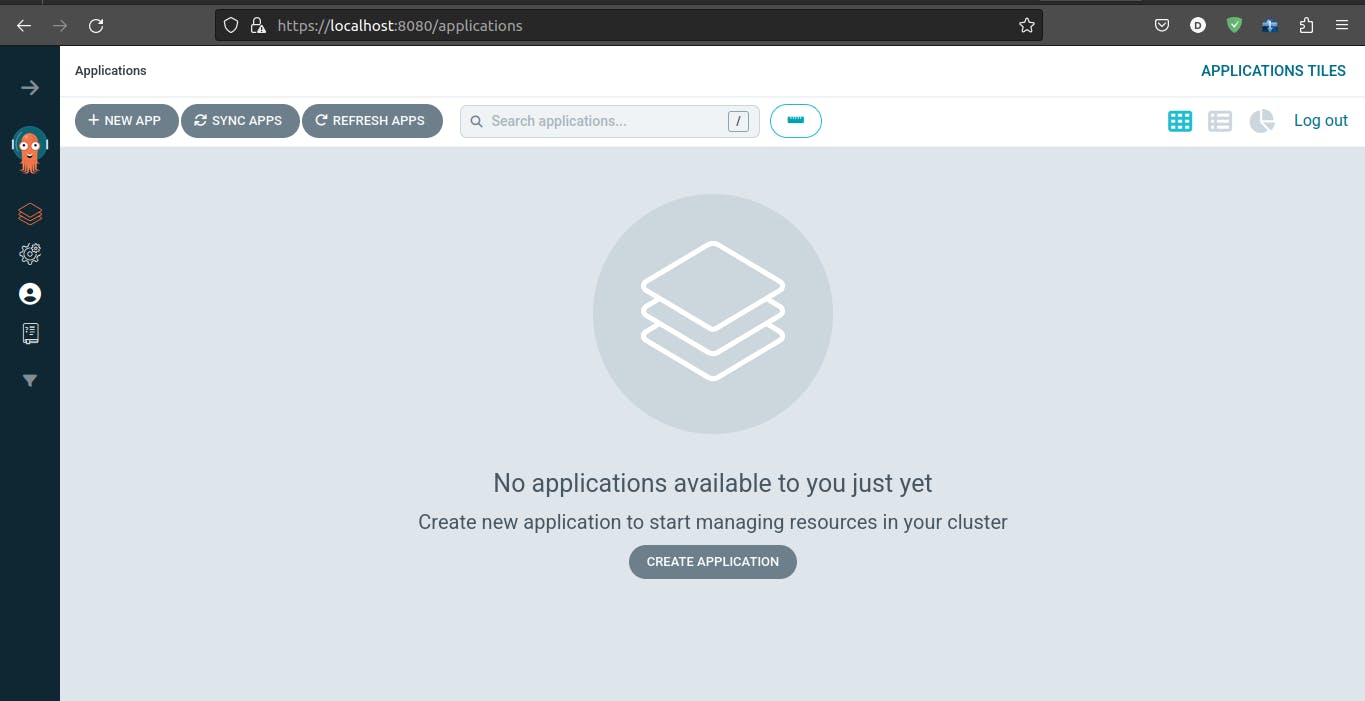
Currently, ArgoCD is empty as we haven't configured any applications yet. Let's proceed with configuring ArgoCD to connect to a GitHub repository where our deployment files will be hosted.
It's important to note that in best practices, it is recommended to separate the application repository from the deployment repository. However, for the purpose of this activity, we will keep the deployment files alongside the application files. Please keep in mind that this is not a recommended practice for production-ready environments. In such scenarios, it is crucial to separate the two repositories to ensure a more organized and manageable deployment workflow.
Configuring ArgoCD
To configure ArgoCD to connect to your GitHub repository and deploy your application,
- Create a YAML file, such as
argocd-config.yaml, and add the following content:
apiVersion: argoproj.io/v1alpha1
kind: Application
metadata:
  name: argo-cd-demo
  namespace: argocd
spec:
  project: default

  source:
    repoURL: https://github.com/davWK/argoCD-demo.git
    targetRevision: HEAD
    path: deploy/kubernetes/
  destination:
    server: https://kubernetes.default.svc
    namespace: demo-app-for-argo-cd

  syncPolicy:
    automated:
      selfHeal: true
      prune: true
Now, let's break down what each section of the YAML file does:
metadata: Specifies the metadata for the ArgoCD application, including its name and namespace.spec.project: Specifies the project within ArgoCD where the application belongs. In this case, it is set to the default project.source: Defines the source repository details:repoURL: Specifies the URL of the GitHub repository where your application's deployment files are hosted.targetRevision: Specifies the target revision of the repository to deploy. Here, it is set toHEAD, meaning the latest revision.path: Specifies the path within the repository where your application's Kubernetes deployment files are located. the path ArgoCD will track for any modification
destination: Specifies the destination details for the deployment:server: Specifies the URL of the Kubernetes API server. Here, it is set tohttps://kubernetes.default.svc. It can be an external clusternamespace: Specifies the target namespace in which the application will be deployed. In this case, it is set todemo-app-for-argo-cd.
syncPolicy: Defines the synchronization policy for the application:automated: Specifies that the synchronization should be automated, enabling self-healing and pruning capabilities.selfHeal: Enables self-healing, ensuring the application stays in the desired state.prune: Enables pruning, removing any resources that are no longer defined in the deployment files.
- Save the file and apply the configuration by running the following command:
kubectl apply -n argocd -f argocd-config.yaml
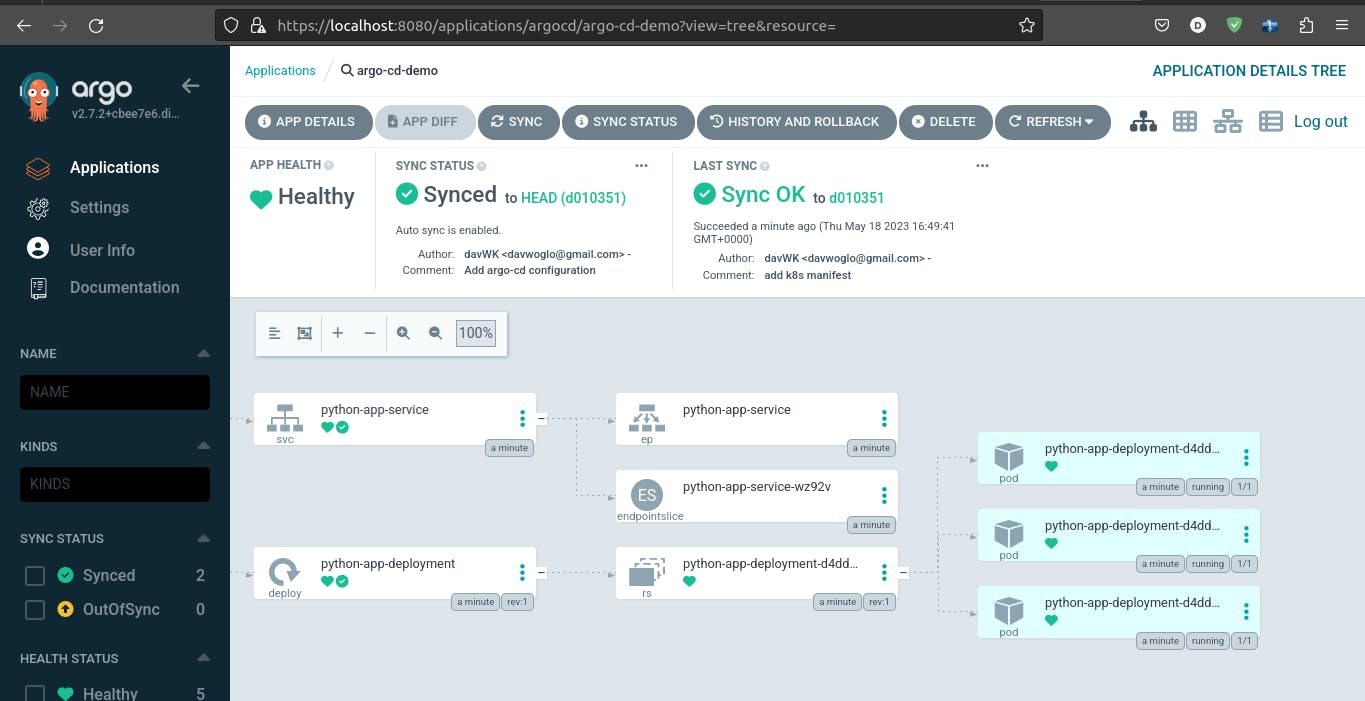
By applying this configuration, ArgoCD will establish a connection to the specified GitHub repository, fetch the deployment files from the specified path, and deploy the application to the designated namespace within the Kubernetes cluster.
Once you apply the configuration using the command kubectl apply -n argocd -f argocd-config.yaml, you will no longer need to manually apply any changes to your Kubernetes files. ArgoCD takes over the responsibility of tracking and applying changes automatically.
After the initial deployment, ArgoCD continuously monitors the specified GitHub repository and the Kubernetes files within it. Whenever there is a change detected in the repository, ArgoCD will automatically apply those changes to your Kubernetes cluster. This ensures that your application remains up-to-date with the latest version defined in the repository.
With ArgoCD in place, you can focus on making changes to your application's deployment files in the repository, and ArgoCD will handle the synchronization and deployment to the Kubernetes cluster for you. This simplifies the deployment process and provides a seamless experience for maintaining the desired state of your applications.
Writing the python app deployment file for kubernetes
At this stage, the configuration will be created in ArgoCD, but no application pods or services will be available. This is because we have not yet defined the Kubernetes deployment manifest that contains the deployment information for our Python demo app. However, once this manifest is in place, ArgoCD will automatically apply it, resulting in the deployment of the application.
To proceed, you need to create the Kubernetes deployment manifest file that describes the desired state of your application, such as the container image, ports, and any other necessary configurations. Once you have the deployment manifest ready, commit and push it to your GitHub repository.
ArgoCD will then detect the changes in the repository and automatically apply the deployment manifest, triggering the creation of the corresponding pods and services. This automatic synchronization ensures that the deployed application aligns with the desired state defined in the deployment manifest.

To proceed with defining the Kubernetes deployment manifest for the Python demo app:
Inside the
deploy/kubernetesdirectory, create a newdeployment.yaml.Open the
deployment.yamlfile and add the following content:
apiVersion: apps/v1
kind: Deployment
metadata:
  name: python-app-deployment
  labels:
    app: python-app
spec:
  replicas: 3
  selector:
    matchLabels:
      app: python-app
  template:
    metadata:
      labels:
        app: python-app
    spec:
      containers:
      - name: image-name
        image: imageurl
        ports:
        - containerPort: 5000
---
apiVersion: v1
kind: Service
metadata:
  name: python-app-service
spec:
  type: NodePort
  selector:
    app: python-app
  ports:
    - protocol: TCP
      port: 80
      targetPort: 5000
      nodePort: 30000
- Save the file.
This deployment manifest defines a Kubernetes Deployment and Service for the Python app. It specifies the container image, ports, replicas, and other necessary configurations.
The Deployment creates three replicas of the Python app pods.
The Service exposes the app using a NodePort type, making it accessible on port 30000 of the cluster nodes.
Commit and push the deployment.yaml file to your GitHub repository. ArgoCD will automatically detect the changes and apply the deployment manifest, leading to the creation of the Python app deployment and service.
Once the synchronization is complete, you should see the app pods running and the service available for access.
To access the deployed Python app:
- Run the following command to get the service information:
kubectl get svc -n <namespace for the Python app>
Replace <namespace for the Python app> with the actual namespace where your Python app is deployed. This command will provide you with the details of the service, including its name, type, cluster IP, and port.
- Once you have the service information, run the following command to set up port forwarding:
kubectl port-forward -n <namespace for the Python app> svc/python-app-service 8083:<service port>
Replace <namespace for the Python app> with the actual namespace where your Python app is deployed, and <service port> with the port number specified in your service configuration (e.g., 80).
This command establishes a connection between your local machine and the Python app service running in the Kubernetes cluster. It forwards traffic from your local port 8083 to the specified service port.
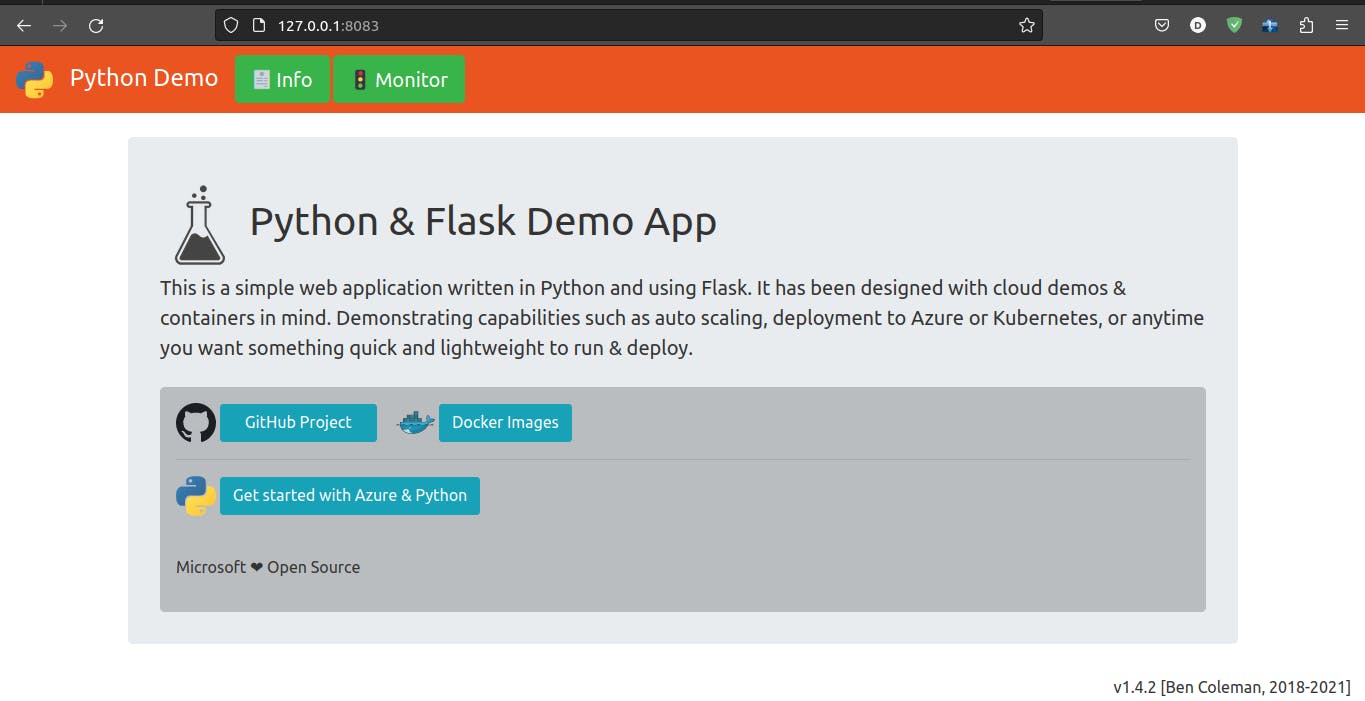
- Now, you can access the deployed Python app by opening a web browser and navigating to
http://localhost:8083. This will direct your requests to the Python app service running in the Kubernetes cluster.
Conclusion
In conclusion, setting up Continuous Integration (CI) and Continuous Deployment (CD) processes are crucial for efficient software development and deployment. In this article, we explored the steps to configure CI using GitHub Actions and CD with ArgoCD. By integrating these tools into your workflow, you can automate the build, test, and deployment processes, leading to faster and more reliable software delivery.
To learn more about ArgoCD and its capabilities, you can refer to the official ArgoCD documentation available here. The documentation provides comprehensive information, including installation guides, usage examples, and advanced configurations.
For a practical demonstration and understanding of ArgoCD, you can watch the "ArgoCD tutorial" on YouTube by TechWorld with Nana.
To grasp the concept of GitHub Actions and its integration with CI/CD processes, you can watch the "GitHub Action Tutorial" video by TechWorld with Nana. This video explains the fundamentals and basic concepts of GitHub Actions.
Thanks for reading I hope you found the information helpful and informative. If you have any questions or comments, please feel free to reach out to me or leave a comment below.